Now that we've got the basics out of the way, it's time to play around some. I really put this out here more to give you ideas, not to show you how to do things. These aren't perfect samples – they're just working concepts to help you get your own mind going off on other, cooler paths.
Light Sourcing[]
One thing that's very important when dealing with graphics that have highlights and shadows... is to make sure the highlights and shadows feel like they match up.
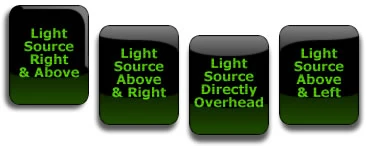
In this example I've taken a generic "black glass" type of image, similar to the one I worked with before, and subjected it to some alterations. For the left and right images, I lifted the lower corner on the "away" side up to bring the highlight more to a point rather than having it come down the side some. I also moved the center point up a bit. The "inside" corner of the highlight got moved down. This is somewhat similar to the method Apple highlights the iTunes "Burn" button with.
I'm not as happy with it, but the leftmost shows the highlight coming from more to the right. I wanted this one to look as though there was a bevel on it rather than having the entire surface mounded up. I do want to draw your attention to the shadows, though. Notice that as the immaginary lightsource moves around from the top toward one side, the shadow falls more and more to the other and less down.
Playing With Spheres[]
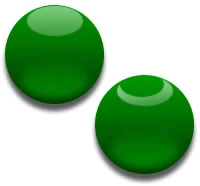

The next thing I wanted to play with was spheres. I see lots of glass spheres for some reason. They're very easy to make. Start with a sphere. Make your highlight and glow out of ovals using the same general lighting concepts shown in the Black Glass tutorial. On the second sphere, I used the "Combine Paths" feature in Fireworks to "punch" a smaller oval out, creating the ring highlight. It's reminiscent of an overhead flourescent bar light.
With the third and fourth, I wanted to show how easy it can be to add depth to a sphere. Obviously, the sphere with the question mark has the punctuation element behind the gloss layer but in front of the others. I find that to feel a little flat, however. I applied a light "inner shadow" to the exclamation point. That makes it feel almost as if it's laser-etched on the inside of the sphere, to me.
Form Elements[]
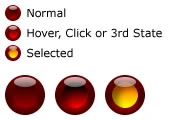
Talking about spheres almost naturally lends to a transition into form elements. After all, what are radio buttons but circles? All it really takes to make a radio button out of a sphere is to add a circle inset into the main circle, under the gloss. "Light" this one exactly the opposite of the main circle (lighter at the bottom than the top) and make it a shade or two brighter. For the hover version, I added a light inner shadow and brightened it up another notch. I chose an orange/yellow gradient for the "selected" version as it stood out well.
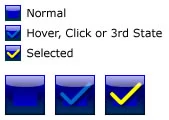
So, how about checkboxes? Similar premise, really. We start with a square with a gradient. An inset square next. In this case, it's just as easy to use a solid-color inner square when you're working so small. Put in the gloss layer too. Instead of changing the color, I put in a check-mark in two different colors for hover and selected, and each of those has a very narrow drop shadow to add a bit of depth.